Ignition comes with Linux executable installers that can be run under any Linux distribution. The installers are capable of running in graphical mode or in command line mode, allowing you to install Ignition on a headless Linux server. Note that Java 6 or later must already be installed on the Linux box before running the installers. To install under a Linux OS, it is assumed that you are comfortable operating a shell.
The installer will install files in the following locations:
/usr/local/bin/ignition (unless a different installation directory was used)- contains binaries, startup scripts and the uninstall executable
/var/lib/ignition/data - contains application-generated files, temporary files and the internal database
/var/lib/ignition/user-lib - contains modules and JDBC jars
/var/log/ignition - contains the wrapper.log and other log files
/etc/ignition - contains configuration files. Symbolic links to these files are created in /var/lib/ignition/data.
The first step is to download the Ignition Linux executable installer from our website. Be sure to download the 32-bit installer for a 32-bit Linux installation, and the 64-bit installer for a 64-bit Linux installation. A 32-bit installer will not launch in a 64-bit system and vice versa. After downloading the installer, follow the directions below to install Ignition as a Linux service.
![]() You need to be able to run as ROOT (prefix everything with 'sudo', run 'sudo su', or login as root user).
You need to be able to run as ROOT (prefix everything with 'sudo', run 'sudo su', or login as root user).
| 1. | Open a command shell and navigate to the installer executable. |
On the command line, run:
chmod +x ignition_X.X.X-installer.run
| 2. | Start the installer executable If you are running the installer in a shell in a graphical environment, the graphical installer will open automatically. If you are running the installer in a headless Linux installation, or through a SSH shell, the text installer will open automatically. Want to run the text installer in a graphical environment? Add --mode text to the end of the command below. |
On the command line, run:
./ignition_X.X.X-installer.run
After the installer starts, if you agree to the licensing terms, continue on to the next step.
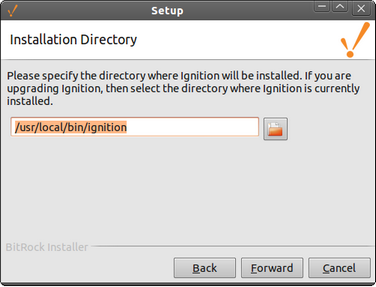
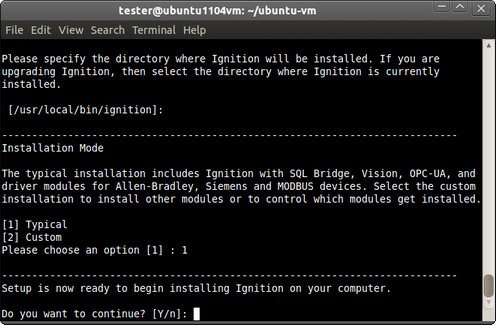
Choosing the installation directory- graphical mode
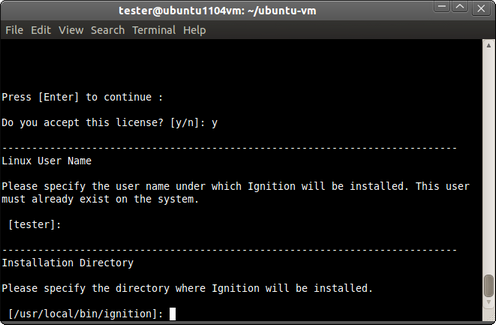
Choosing the installation directory- text mode
This section allows you to change the installation location. Use the default value of /user/local/bin/ignition unless you have a need to use a different folder. After you have selected your installation directory, continue on to the next step.
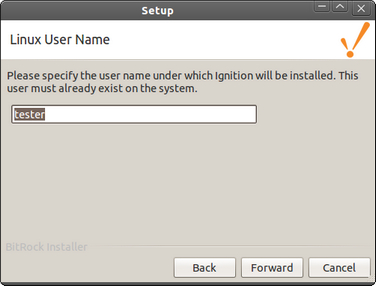
User selection- graphical mode

User selection- text mode
In order to set the permissions on the folders created by the installer, the Linux installer requires a user name. This user will be able to start and stop Ignition and run the Gateway Control Utility and command line interfaces. The binaries in the installation folder are still owned by root and cannot be modified without root access. The selected user must already exist on the system before starting the installer. For Ubuntu installations, the user that invoked sudo is used by default. For other Linux installations, this field is initially blank. After you have entered the user, continue on to the next step.
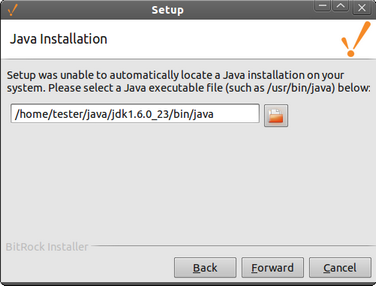
Selecting an existing Java installation- graphical mode
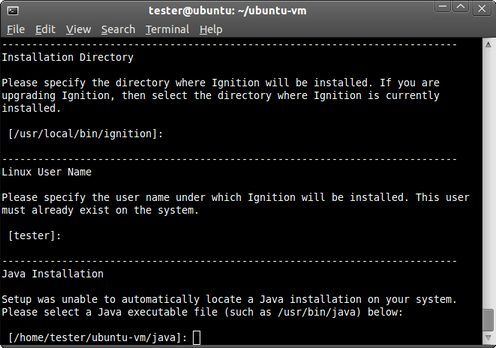
Selecting an existing Java installation- text mode
Normally, the installer is capable of auto-detecting a Java 6 or later installation that has been installed thru APT or some other Linux package management tool. In these cases, the installer will use that Java installation and skip past this step. However, if you have installed Java by extracting the Java binaries to a folder and adding them to the system PATH, the installer will be unable to find the Java binaries. In this case, you must provide the installer with a full path to the Java executable.
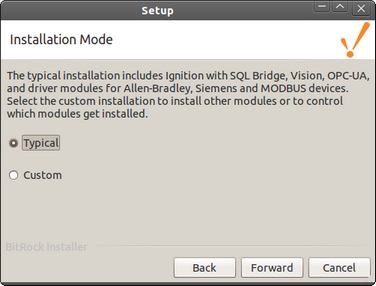
Choosing the Installation Mode- graphical mode
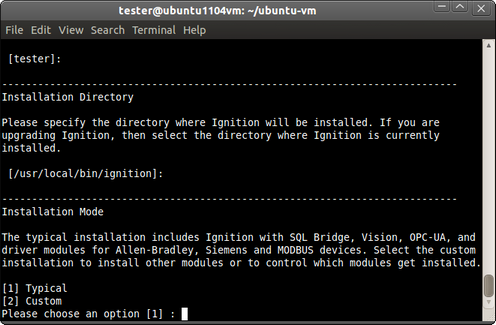
Choosing the Installation Mode- text mode
The next option in the installer is to choose the installation mode. For most scenarios, the Typical mode will install everything that you need to get started. If you would like to add an optional module, such as the OEE Downtime module, select the Custom mode. You can also use the Custom mode to control which modules get installed. When you have made your selection, continue on to the next step.
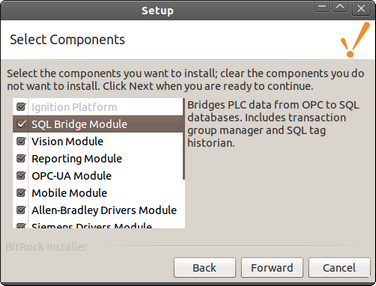
Custom Mode Module Selection- graphical mode
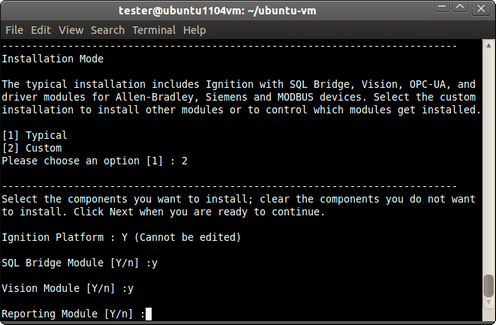
Custom Mode Module Selection- text mode
If you have selected Custom Mode, you will be presented with the screen above. Graphical mode- to view a brief description of the module, click on the module name. Checking the checkbox next to a module will install the module as part of the Ignition installation. Clearing the checkbox next to a module will prevent the module from being installed. Text mode- you will be presented with a list of all the modules, one at a time. Type "y" to install the module, and type "n" to prevent the module from being installed. When you have made your selections, continue on to the next step.
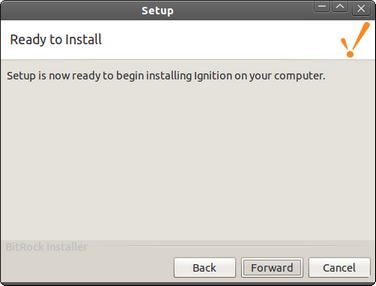
Ready to Install- graphical mode
Ready to Install- text mode
Ignition is ready to be installed. At this point, you may click the Back button (graphical mode) to change your selections. For the text mode, you can only abort the installation at this point by typing "n". Click the Next button (graphical mode) or type "y" (text mode) to finish the installation.
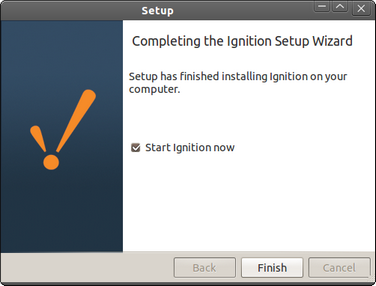
Installation complete- graphical mode
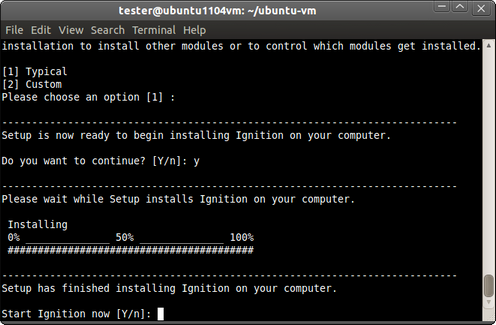
Installation complete- text mode
When the installation is complete, press the "Finish" button (graphical mode) or type "y" to start Ignition or "n" to simply exit (text mode). If you have chosen to start Ignition now, then Ignition will be started as a background process. Use a web browser to navigate to http://localhost:8088 to confirm that your Gateway is running.
| 4. | Stopping and starting Ignition |
After installation, you can start and stop Ignition with the following commands:
/etc/init.d/ignition start
/etc/init.d/ignition stop
| 5. | Ignition as a service |
When installing under Ubuntu, Ignition will start automatically whenever the computer reboots. If you wish to stop this behaviour then you need to use the update-rc.d tool to remove the service (uninstalling Ignition also removes the service).
/etc/init.d/ignition stop
update-rc.d -f ignition remove
rm /etc/init.d/ignition
When installing under other Linux distributions, you will need to use that distribution's method to automatically start a program after reboot.
For example, this command will autostart Ignition installed in a Fedora 15 system (run as root user):
chkconfig --level 2345 ignition on
| 6. | Setting the system PATH |
For Ubuntu installations, the installation directory is automatically appended to the system PATH. This allows you to start programs like the Gateway Control Utility from the command line without specifying a complete path to the installation directory. Note that after installation, you need to close and reopen the command shell for the PATH change to take effect. For other Linux installations, you will need to manually add /usr/local/bin/ignition (or your installation directory) to any script that can set the system PATH (such as .profile or .bashrc).
Automated installation
Ignition can be silently installed from a command shell without showing any user prompts. This allows you to automate Ignition installation across different machines using scripts. Keep in mind that the installer cannot automatically start the Gateway after a silent installation. Use the /etc/init.d/ignition start command as shown below.
Command line example:
sudo ./ignition-7.x.x-linux-x64-installer.run --mode unattended --prefix /somefolder/bin/ignition --unattendedmodeui none
/etc/init.d/ignition start
Flags:
-- mode unattended (ensures that no prompts appear during installation)
-- prefix /somefolder/bin/ignition (optional flag; if a value is set, then Ignition will be installed in the specified folder, otherwise Ignition will be installed in /usr/local/bin/ignition by default)
-- serviceuser username (allows a Linux system user to be installed (i.e., a user that cannot log in to the OS))
-- unattendedmodeui none | minimal (the 'none' flag will not display any sort of graphic during installation; the 'minimal' flag will display a small progress bar and nothing else, but only if you are working in a graphical system)