Unlike some Linux operations, the Ignition Linux upgrade process is designed to be as painless as possible. Note that while Ignition is currently optimized for Ubuntu Linux, the upgrade process will work for any Linux distribution. Before performing any upgrade, you should back up your gateway (see Backups). The Ignition installer also doubles as an upgrader. Simply download the Linux executable installer from our website, and double-click on it. Be sure to download the 32-bit installer for a 32-bit Linux installation, and the 64-bit installer for a 64-bit Linux installation. A 32-bit installer will not launch in a 64-bit system and vice versa.
![]() You need to be able to run as ROOT (prefix everything with 'sudo', run 'sudo su', or login as root user) to perform the upgrade.
You need to be able to run as ROOT (prefix everything with 'sudo', run 'sudo su', or login as root user) to perform the upgrade.
After downloading the installer, open a command shell and navigate to the installer executable. Run:
chmod 744 *
Then run:
./ignition_X.X.X-installer.run
If you are running the installer in a shell in a graphical environment, the graphical installer will open automatically. If you are running the installer in a headless Linux installation, or through a SSH shell, the text installer will open automatically. Want to run the text installer in a graphical environment? Add --mode text to the end of the command above.
After the installer starts, if you agree to the licensing terms, continue on to the next step.
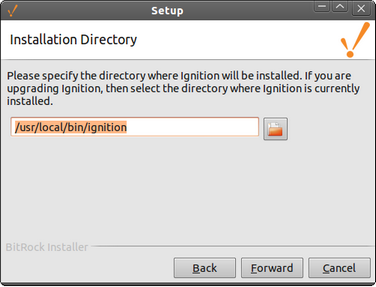
Choosing the installation directory- graphical mode
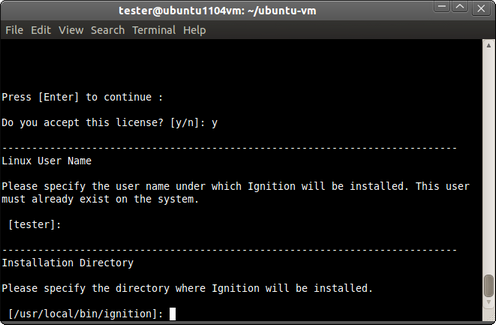
Choosing the installation directory- text mode
Linux does not have the concept of a central registry like Windows systems do. Therefore, you must provide the location of the existing Ignition installation. By default, this value is /usr/local/bin/ignition, unless you have installed Ignition in another location. After you have selected your installation directory, continue on to the next step.
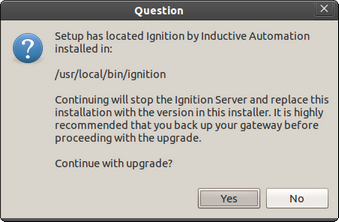
Upgrade confirmation- graphical mode
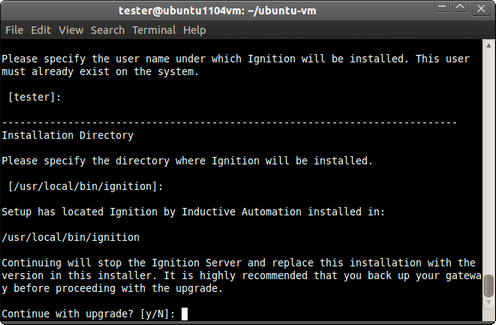
Upgrade confirmation- text mode
If the upgrader is able to locate Ignition in the specified folder, you will presented with the screen above. Click Yes or type "y" to continue.
.
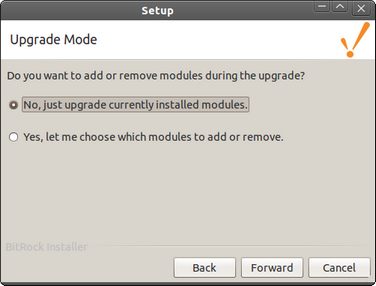
Selecting the Upgrade Mode- graphical mode
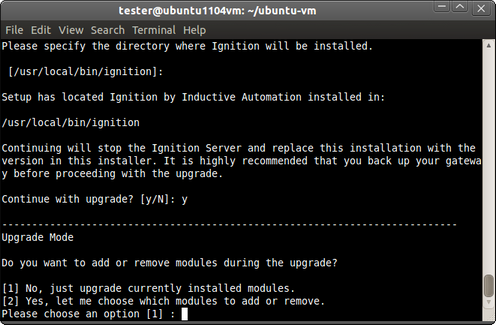
Selecting the Upgrade Mode- text mode
For most scenarios, choosing to just upgrade currently installed modules will be sufficient, as it will upgrade the Ignition base installation and the existing modules. Choosing "Yes" will take you to the module selection screen on the next page, where you can add a module that was not part of the original installation or uninstall a currently installed module. When you have made your selection, continue to the next section.
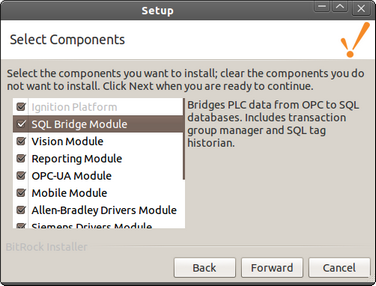
Selecting modules to add or remove- graphical mode
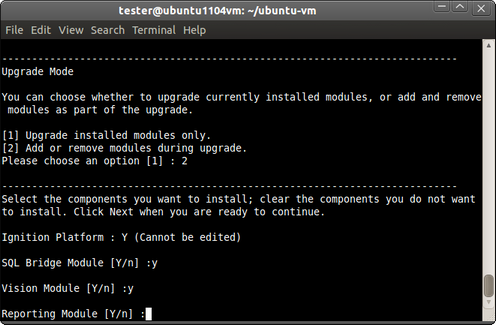
Selecting modules to add or remove- text mode
If you have chose to select which modules to add or remove on the previous screen, you will be presented with the screen above. Graphical mode-to view a brief description of the module, click on the module name. Checking the checkbox next to a module will install the module as part of the upgrade. Clearing the checkbox next to a module will uninstall the module during the upgrade. Text mode- you will be presented with a list of all the modules, one at a time. Type "y" to install or upgrade the module, and type "n" to uninstall the module. When you have made your selections, continue on to the next step.
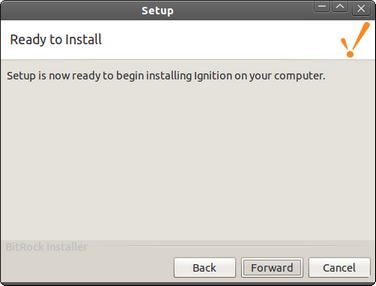
Ready to Install- graphical mode
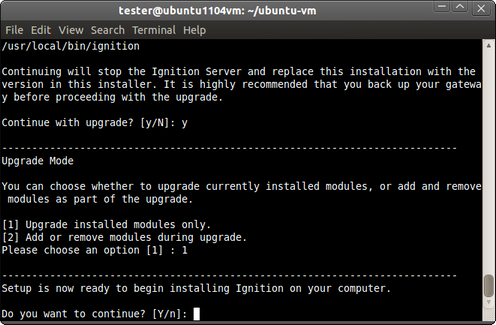
Ready to Install- text mode
Ignition is ready to be upgraded. At this point, you may click the Back button (graphical mode) to change your selections. For the text mode, you can only abort the upgrade at this point by typing "n". Click the Next button (graphical mode) or type "y" (text mode) to finish the upgrade.
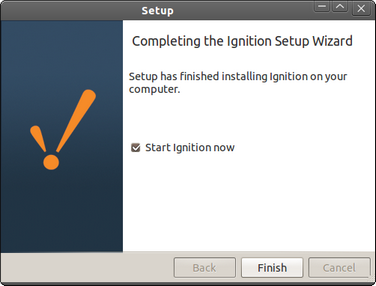
Installation complete- graphical mode
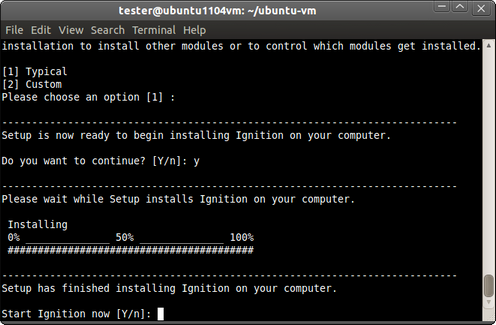
Installation complete- text mode
When the upgrade is complete, press the "Finish" button (graphical mode) or type "y" to start Ignition or "n" to simply exit (text mode). If you have chosen to start Ignition now, then Ignition will be started as a background process. Use a web browser to navigate to http://localhost:8088 to confirm that your Gateway is running. For instructions on how to stop or start Ignition, see the Installation (Linux) section.
Automated upgrade
Ignition can be silently upgraded from a command shell without showing any user prompts. Keep in mind that you should make a Gateway backup before performing any type of upgrade. Also, the installer cannot automatically start the Gateway after a silent upgrade. Use the /etc/init.d/ignition start command as shown below.
Command line example:
gwcmd -b /var/backups/mybackup.gwbk
sudo ./ignition-7.x.x-linux-x64-installer.run --mode unattended --unattendedmodeui none --autoupgrade true
/etc/init.d/ignition start
Flags:
-- mode unattended (ensures that no prompts appear during installation)
-- unattendedmodeui none | minimal (the 'none' flag will not display any sort of graphic during installation; the 'minimal' flag will display a small progress bar and nothing else, but only if you are working in a graphical system)
-- autoupgrade true (runs the installer in upgrade mode)